to function.
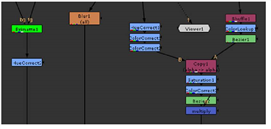
You can modify the color, name, and notes that a particular node displays. Doing so can make it easier for other artists to decipher the intent of your script. For example, you might color all nodes green that relate to keying.
|
|
| Nodes can be color-coded according to function. |
| 1. | Double-click on the node to display its properties panel. |
| 2. | Click the Node tab at the top of the dialog. Its attributes appear. |
| 3. | Do any of the following: |
• Enter a new name for the node on top of the old name.
• Click on the left color button ![]() to change the color of the node. To copy a color of one node to another, drag and drop the color button from the node whose color you want to copy on top of the color button in the node whose color you want to change.
to change the color of the node. To copy a color of one node to another, drag and drop the color button from the node whose color you want to copy on top of the color button in the node whose color you want to change.
• Type any comments regarding the node in the label field. These appear on the surface of the node.
• From the font dropdown menu, select the font type for any text on the node.
• Use the buttons on the right ![]() to bold or emphasize the text.
to bold or emphasize the text.
• Enter the font size in the font size field ![]() .
.
• Click color ![]() to choose a new font color.
to choose a new font color.
• The Select color dialog appears, allowing you to select the desired color.
TIP: You can also have Nuke automatically color-code nodes for you based on their function. Select Edit > Preferences (or press Shift+S) to open the Preferences dialog. Click on the Node Colors tab, and check the autocolor option.
Thereafter, every time you add a node to a script, the node takes on the color appropriate to its function. You can edit these colors as necessary on the Node Colors tab of the Preferences dialog.
• Check hide input to conceal the node’s incoming pipe. This can enhance the readability of large scripts.
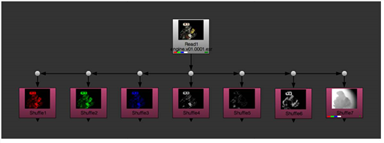
• Check postage stamp to display a thumbnail render of the node’s output on its surface. You can also press Alt+P on the Properties Bin to toggle postage stamps.
If you want the postage stamp to display a fixed frame (rather than update to match the current frame), enter the frame to display in the static frame field. For this to work, you also need to press Shift+S to open the Preferences dialog, go to the Node Graph tab, and make sure postage stamp mode is set to Static frame.
Note that if the frame number you use is outside the frame range for the node, it is clamped to the first or last frame in the range.